pan + pantry
  • Home
  • PAN
    • starters
    • entreés
    • sides
    • snacks
    • sweets
    • breakfast
  • PANTRY
    • ingredients
    • restaurants & places
    • etc
  • About
  • Contact

air fryer toasted ravioli

1/5/2019

1 Comment

 
- starters, air fryer recipes -
Picture
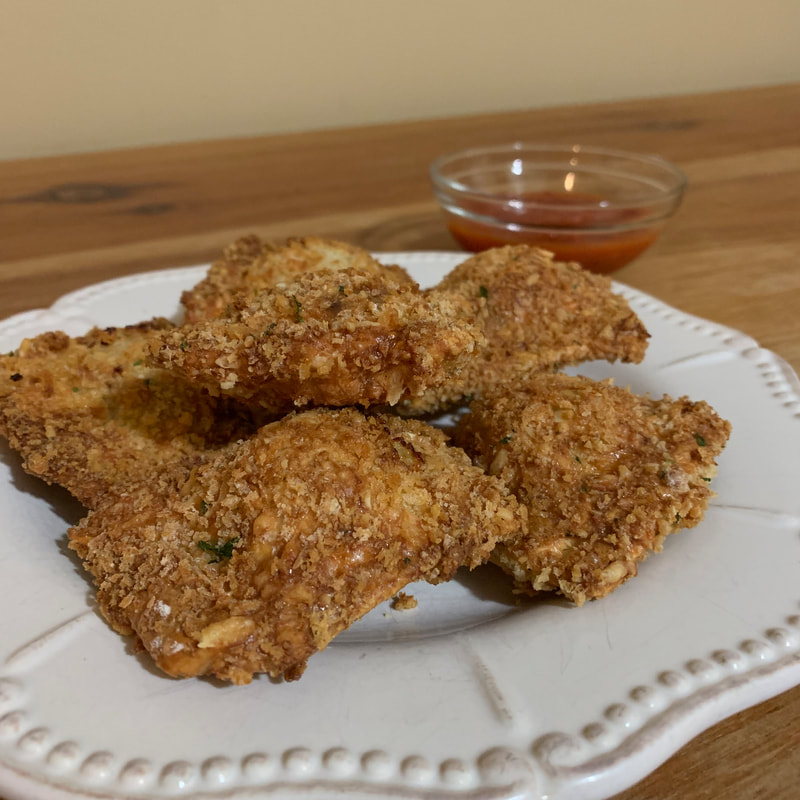
toasted ravioli have been one of my favorite appetizers, especially in st. louis (where it orginated) when i visit my grandparents. i've made ravioli several times, but i'd never made them with meat in them up until this point. i decided i would make toasted ravioli for new year's eve, so that i could try out my air fryer that i got for christmas and figure out a good meat filling for ravioli. i'm not going to lie to you, this isn't a 20 minute meal. this will take you a long time, but the end result is well worth the time. there are a couple shortcuts you can take. you can use pre-made pasta dough, you can use fresh ravioli, or you can even use pre-made. frozen toasted ravioli, and you could simply use this recipe for cooking times in the air fryer. 
print this recipe

INGREDIENTS

PASTA DOUGH
1 1/2 cup + 2 tbsp semolina flour
1 1/2 cup all purpose flour
2 eggs
2 tbsp garlic salt (i like Lawry's because it has parsley in it)
a little under 3/4 cup water
3 tbsp olive oil

RAVIOLI FILLING
1/2 yellow onion, minced
2-3 large garlic cloves
​3 tbsp olive oil, divided
4 tbsp garlic salt
freshly ground black pepper, to taste
1/4 cup fresh parsley, minced (1/2 grocery store packet), optional
1 egg whisked with 1 tbsp of water
​
BREADING
3 cups panko bread crumbs
1.5 cups flour
6 eggs
1.5 cups grated parmesan
1/2 cup fresh parsley, minced (1 grocery store packet)
4 tbsp garlic salt
​black pepper, to taste

serve with marinara
​

​DIRECTIONS

PASTA DOUGH
  1. combine the AP flour, semolina flour, and garlic salt in a stand mixer with a dough hook attached
  2. whisk eggs, water, and olive oil in a separate bowl
  3. slowly stream in the egg mixture with the mixture on a low speed
  4. continue mixing in the stand mixer until it forms a ball, if it's too sticky, add semolina flour, 1 tablespoon at a time. if it's not forming together, add water, 1 tablespoon at a time
  5. lightly flour a flat surface (a cutting board or just a clean counter) with semolina flour
  6. knead the dough until it feels stretchier, then transfer it to a bowl and cover it with a kitchen towel or plastic wrap (if you do use plastic wrap, lightly drape it over the bowl, don't seal it)
  7. let rest for at least 1 hour but not longer than 3-4 hours
​RAVIOLI FILLING
  1. sauté the onions in 1 tbsp of olive oil in a medium/large pan over medium heat until tender (approx. 4 minutes)
  2. add the garlic and saute for an additional 2 minutes
  3. remove from the pan and transfer to a plate with paper towels to drain excess oil on it
  4. add another tablespoon of oil in the pan and add the ground beef
  5. while it is cooking, break the ground beef up into small crumbles.
  6. continue breaking it up until it is fully cooked, then remove it from pan (it can go on the same plate as the onions, just make sure it drains
  7. remove any excess liquid in the pan (if it's just a little oil it's okay) and add the remaining tablespoon of oil
  8. add the italian sausage, breaking it up just like you did for the ground beef
  9. cook until the sausage is fully cooked and remove it (you should probably put it on another plate in order to make sure all the excess oil drains)
  10. combine the sausage, onions, garlic, and ground beef in a bowl. add the ricotta, garlic salt, black pepper, and parsley (optional) and stir to combine
FORMING THE RAVIOLI
  1. cut the pasta dough into 4 equal parts
  2. knead each individual part again and form it into roughly a quarter inch rectangle (just make it thin enough to start to get it through the pasta machine
  3. run it through the pasta machine, i use the kitchen aid attachment (find it here) start on the thickest setting and work your way down. it's okay if it doesn't run smoothly at first, just form it a little thinner and start on the 1st setting again. you want to get it as thin as possible, i get to the 4 or 5 setting usually
                if it's sticking to the pasta machine, dust the machine with semolina flour
  1. lay the sheet out on a lightly floured surface and cut it in half
  2. put 1-2 tablespoons of the filling in a ball in the center of the row, leaving 3/4-1 inch in between each ball of filling 
  3. brush the egg wash in between the meat mixture balls and anywhere else the pasta dough is exposed
  4. lay the other 1/2 of the pasta dough over top
  5. start in the middle of the row, pushing the air out in the spaces and sealing off the ravioli
  6. cut the ravioli, leaving as much space around the center as you want (i like to use a bench scraper for this)
  7. freeze in a single layer on a surface dusted in semolina flour
​BREADING / AIR FRYING
  1. combine the garlic salt, parsley, parmesan, and panko together in a large bowl
  2. combine the flour and black pepper in a separate, large bowl
  3. whisk the eggs
  4. coat the ravioli in egg, then the flour mixture, back in the egg, then in the panko              * it's easiest to do this when the ravioli are hard from being frozen, but it is not necessary to keep them frozen once they are breaded
  5. spray the air fryer with vegetable spray and air fry them in a single layer on 350 degrees for 15 minutes, turning after 8 minutes (if your air fryer has a tray to do multiple layers at one time, you will need to move the ravioli from the bottom tray to the top tray (and vice versa) when you flip them)
  6. after 15 minutes, check both sides of them and if they need more browning, cook at 350 degrees for 2-4 minutes (put the ones that need more browning on the top rack)
  7. serve when warm and with marinara
print this recipe
1 Comment
Wilmington Arab Escorts link
6/16/2025 12:56:54 am

This recipe sounds delicious! I love trying new things.

Reply


Leave a Reply.


    ALL POSTS
    PAN
    ​
    >> starters
    >> entreés
    ​>> sides
    ​>> snacks
    ​>> sweets
    ​>> ​breakfast
    PANTRY
    ​>> ingredients
    ​>> places
    ​>> ​etc


    WELCOME!

    Picture
    I'm Sam, a high school student and the person behind Pan + Pantry. 

    click
     here to learn more about me and Pan + Pantry.

    RSS Feed

    
  • Home
  • PAN
    • starters
    • entreés
    • sides
    • snacks
    • sweets
    • breakfast
  • PANTRY
    • ingredients
    • restaurants & places
    • etc
  • About
  • Contact